
How to howto/connect a new AutoKeyboard.
Here is the simple how-to connection: seat the cable, confirm the device in the lane, and ensure it remains steady. When your screenshots are provided, we will make each step unmistakable and clear.
howto/connect a new AutoKeyboard
Bind the keyboard device unto a laptop and confirm it is ready in the GUI.
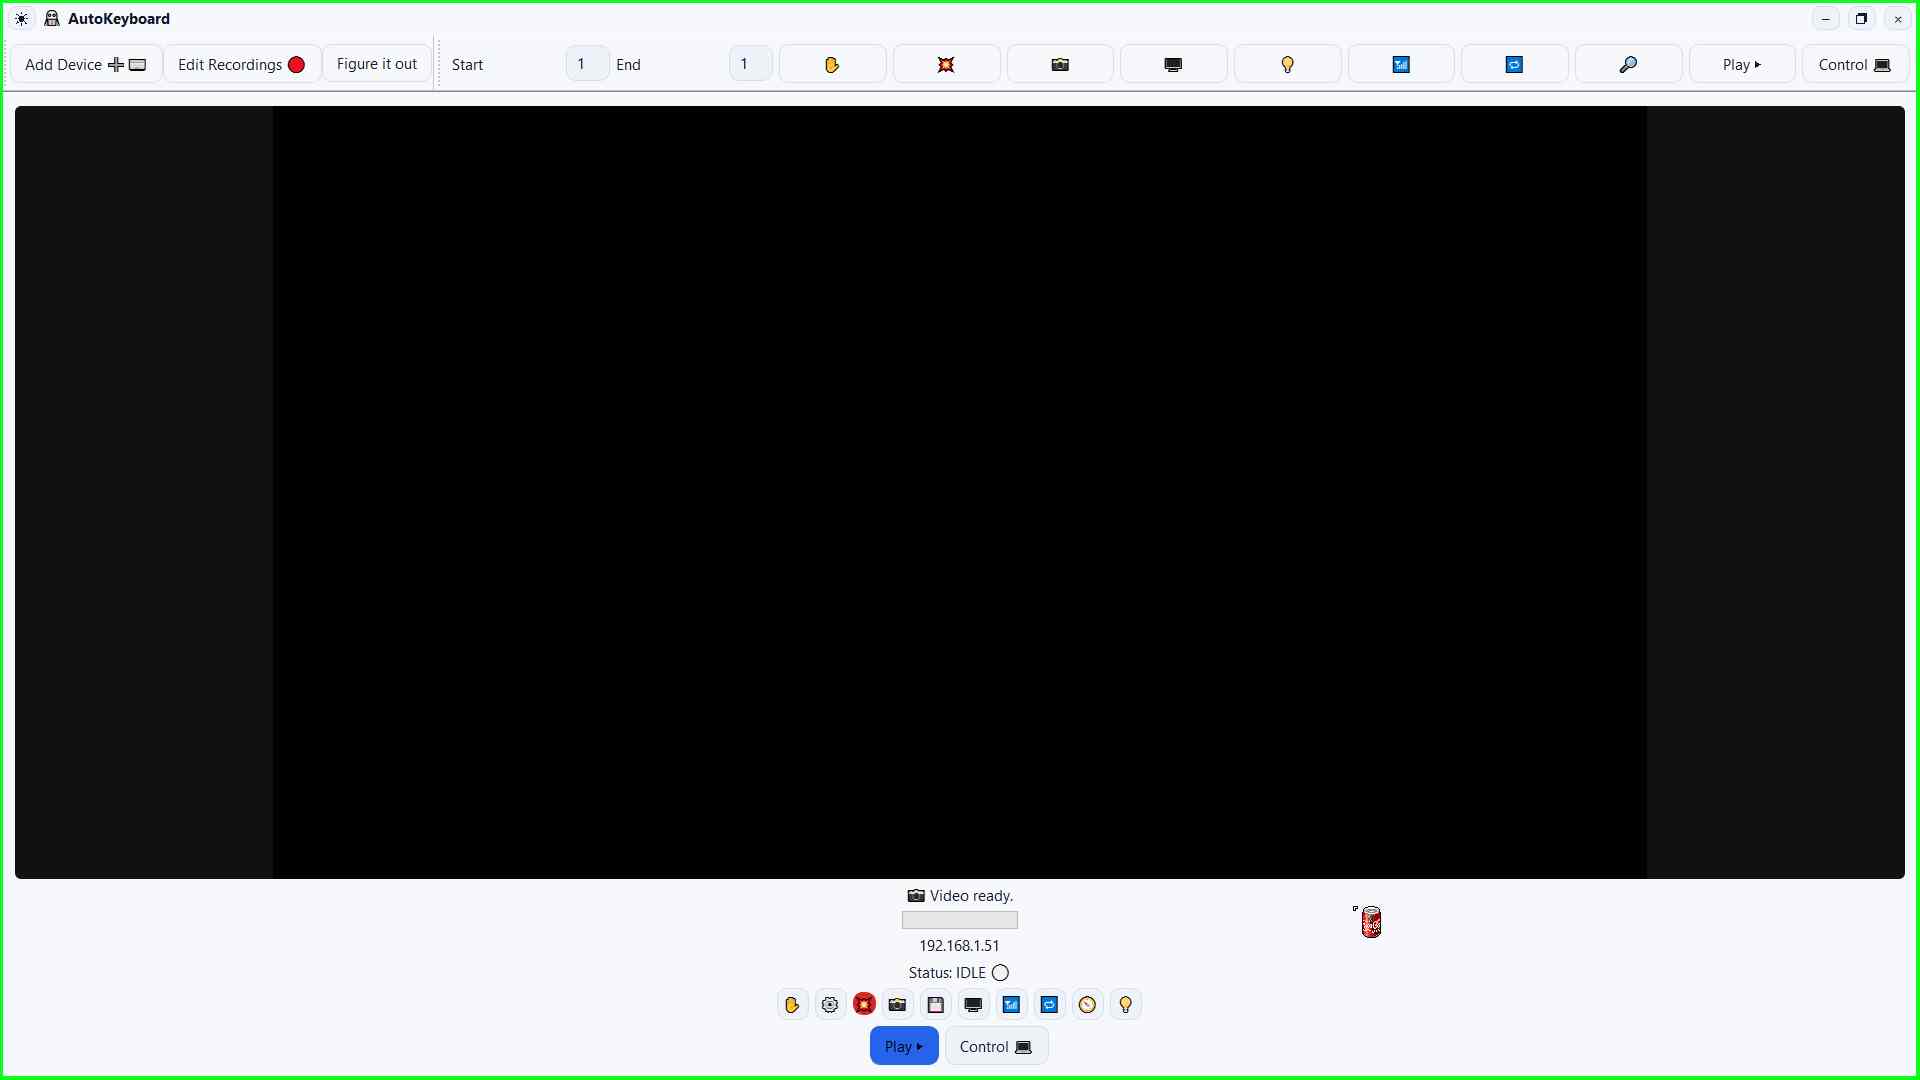
- Video can be seen (even if black screen)
- Status cirlce is either white (Idle) or blue (Plugged in).
- No rapid howto/connect/dishowto/connect cycling.
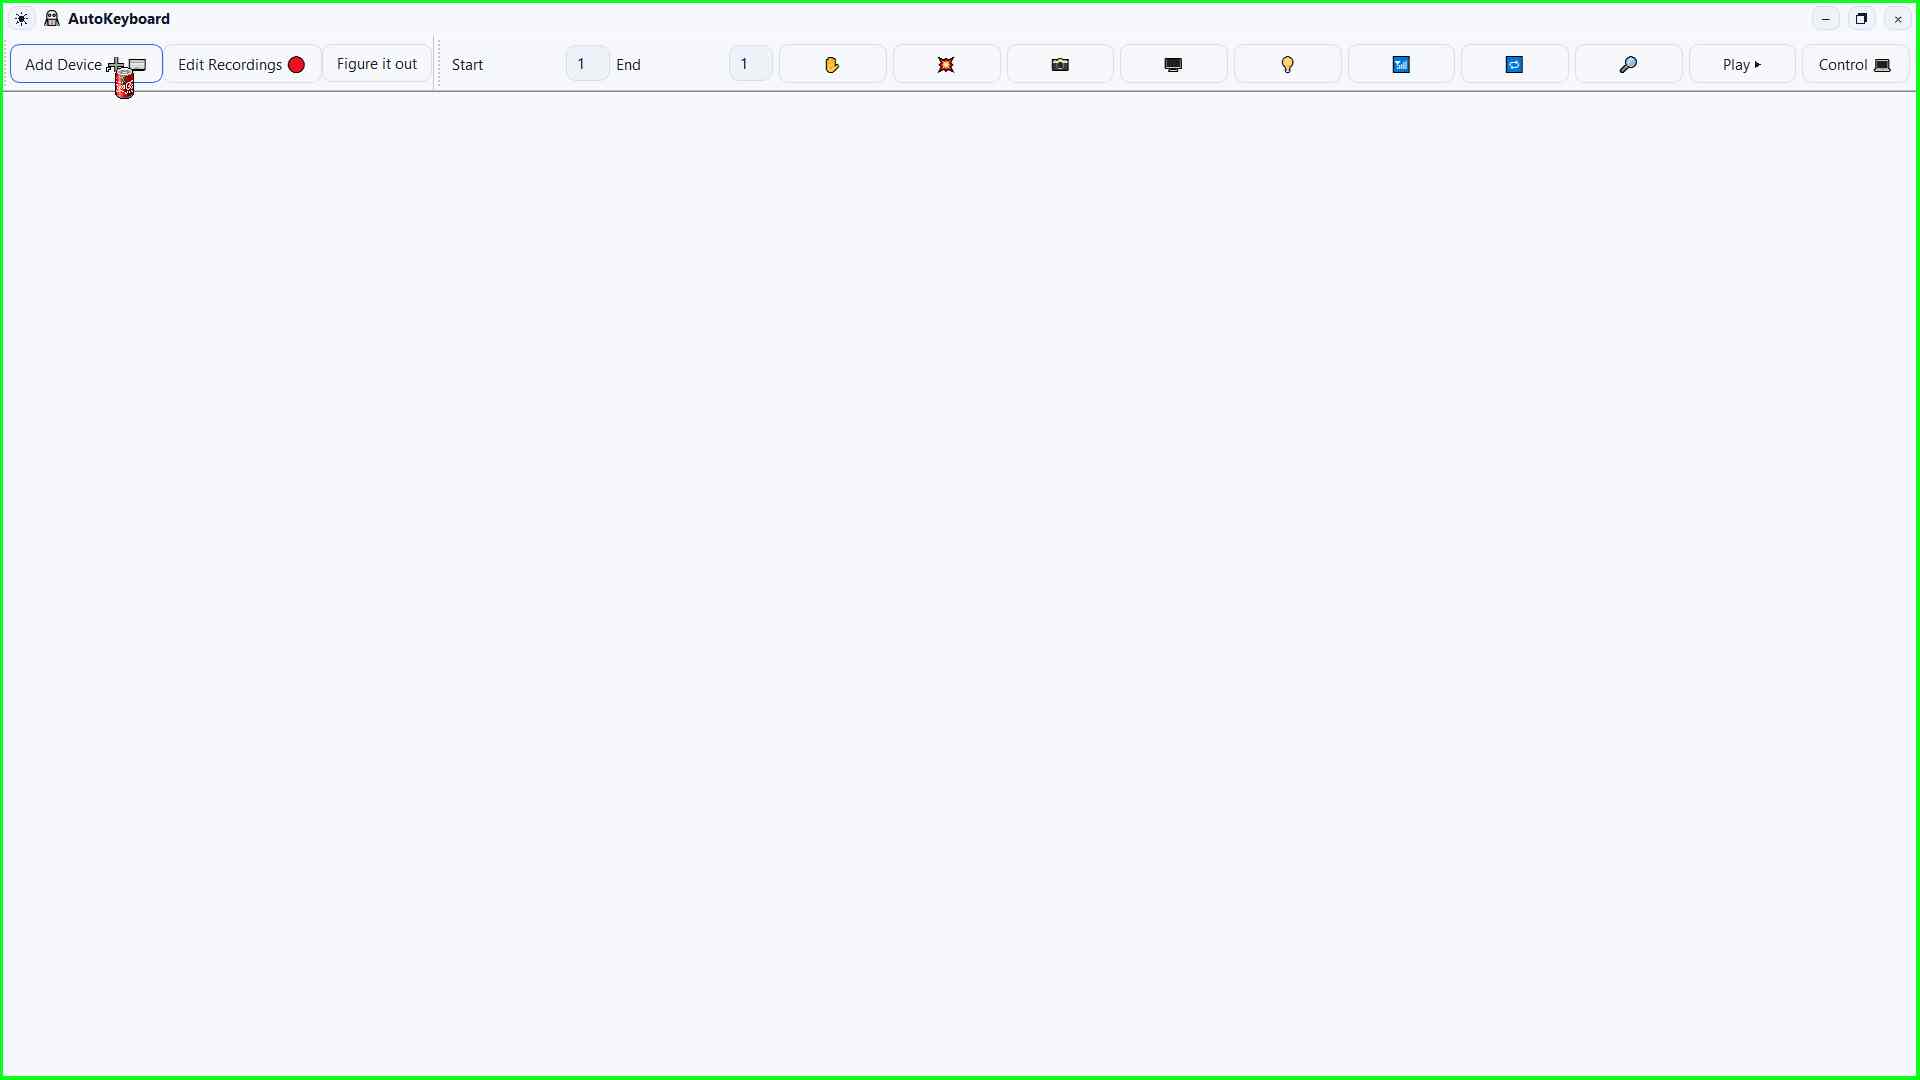
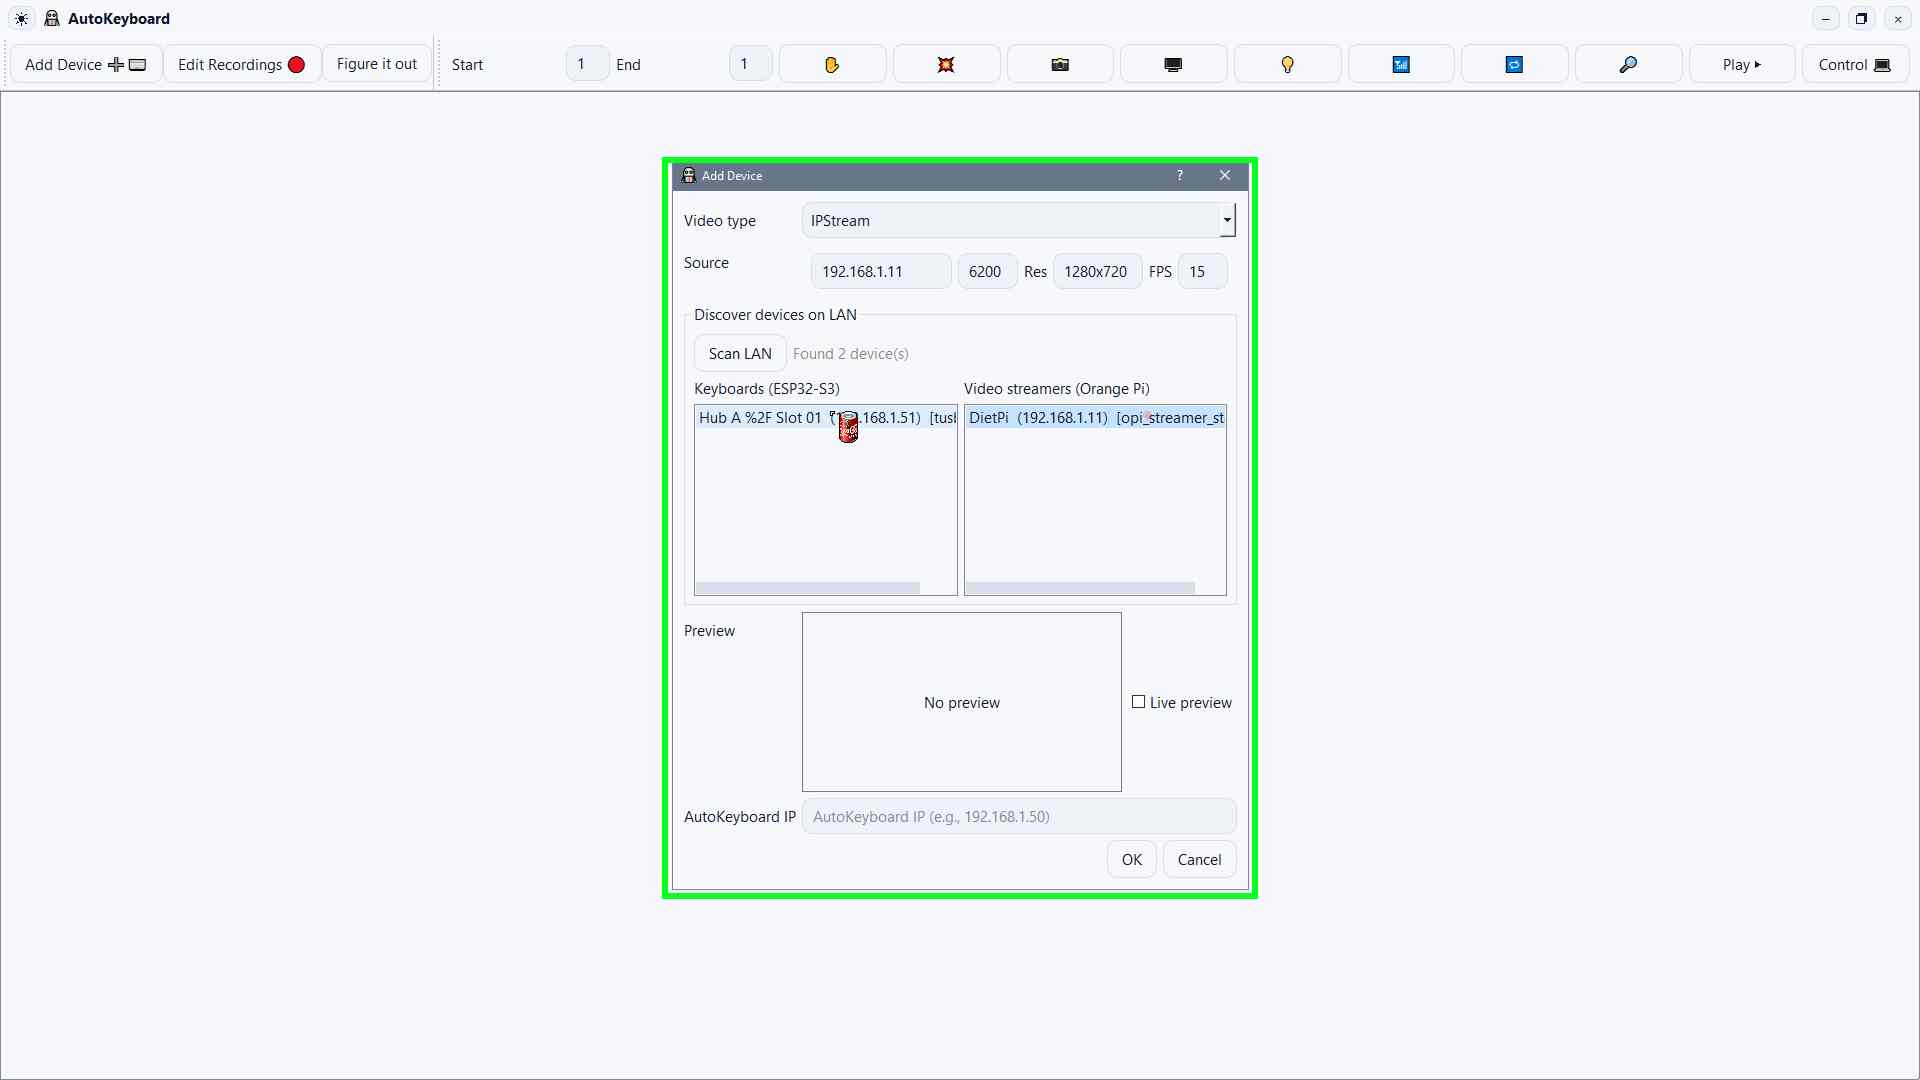
Open Add Device
In the main window, click Add Device to begin pairing.
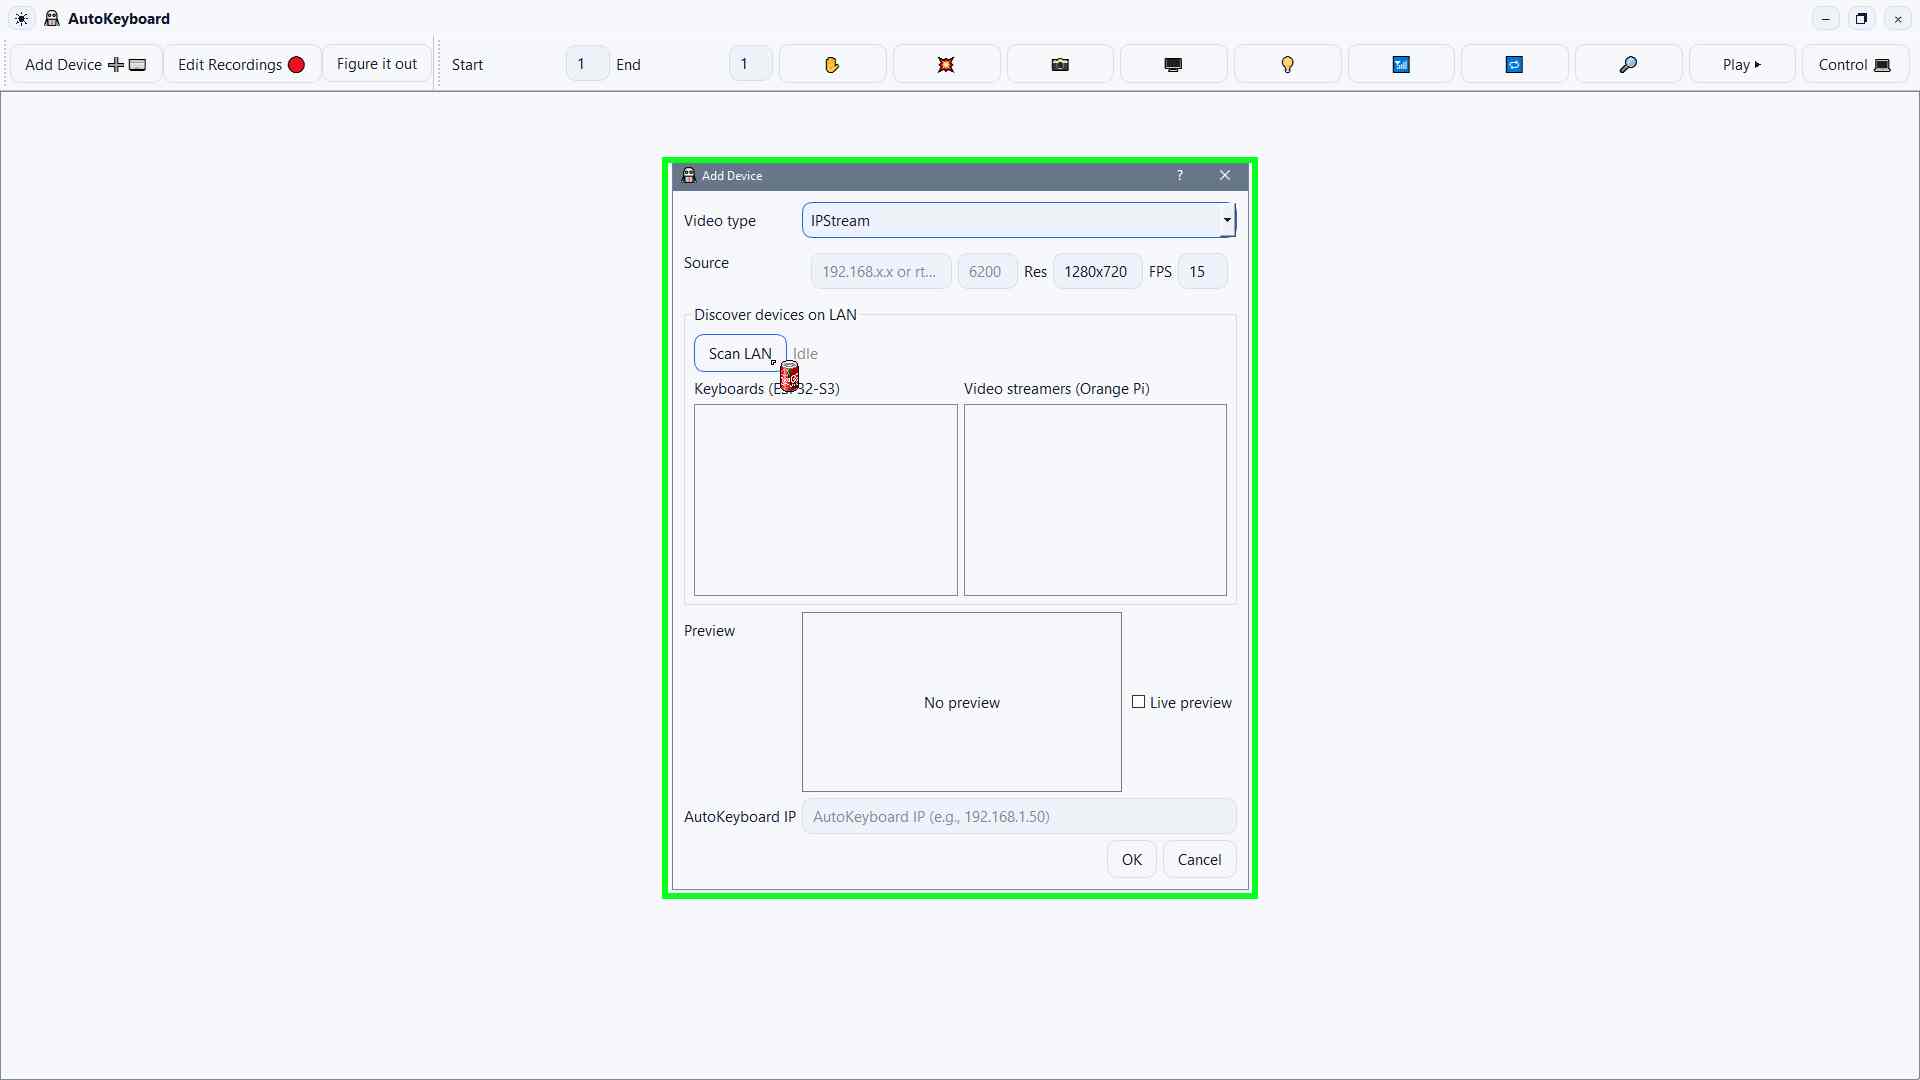
Scan the LAN for devices
Click Scan LAN and wait for the list to populate.
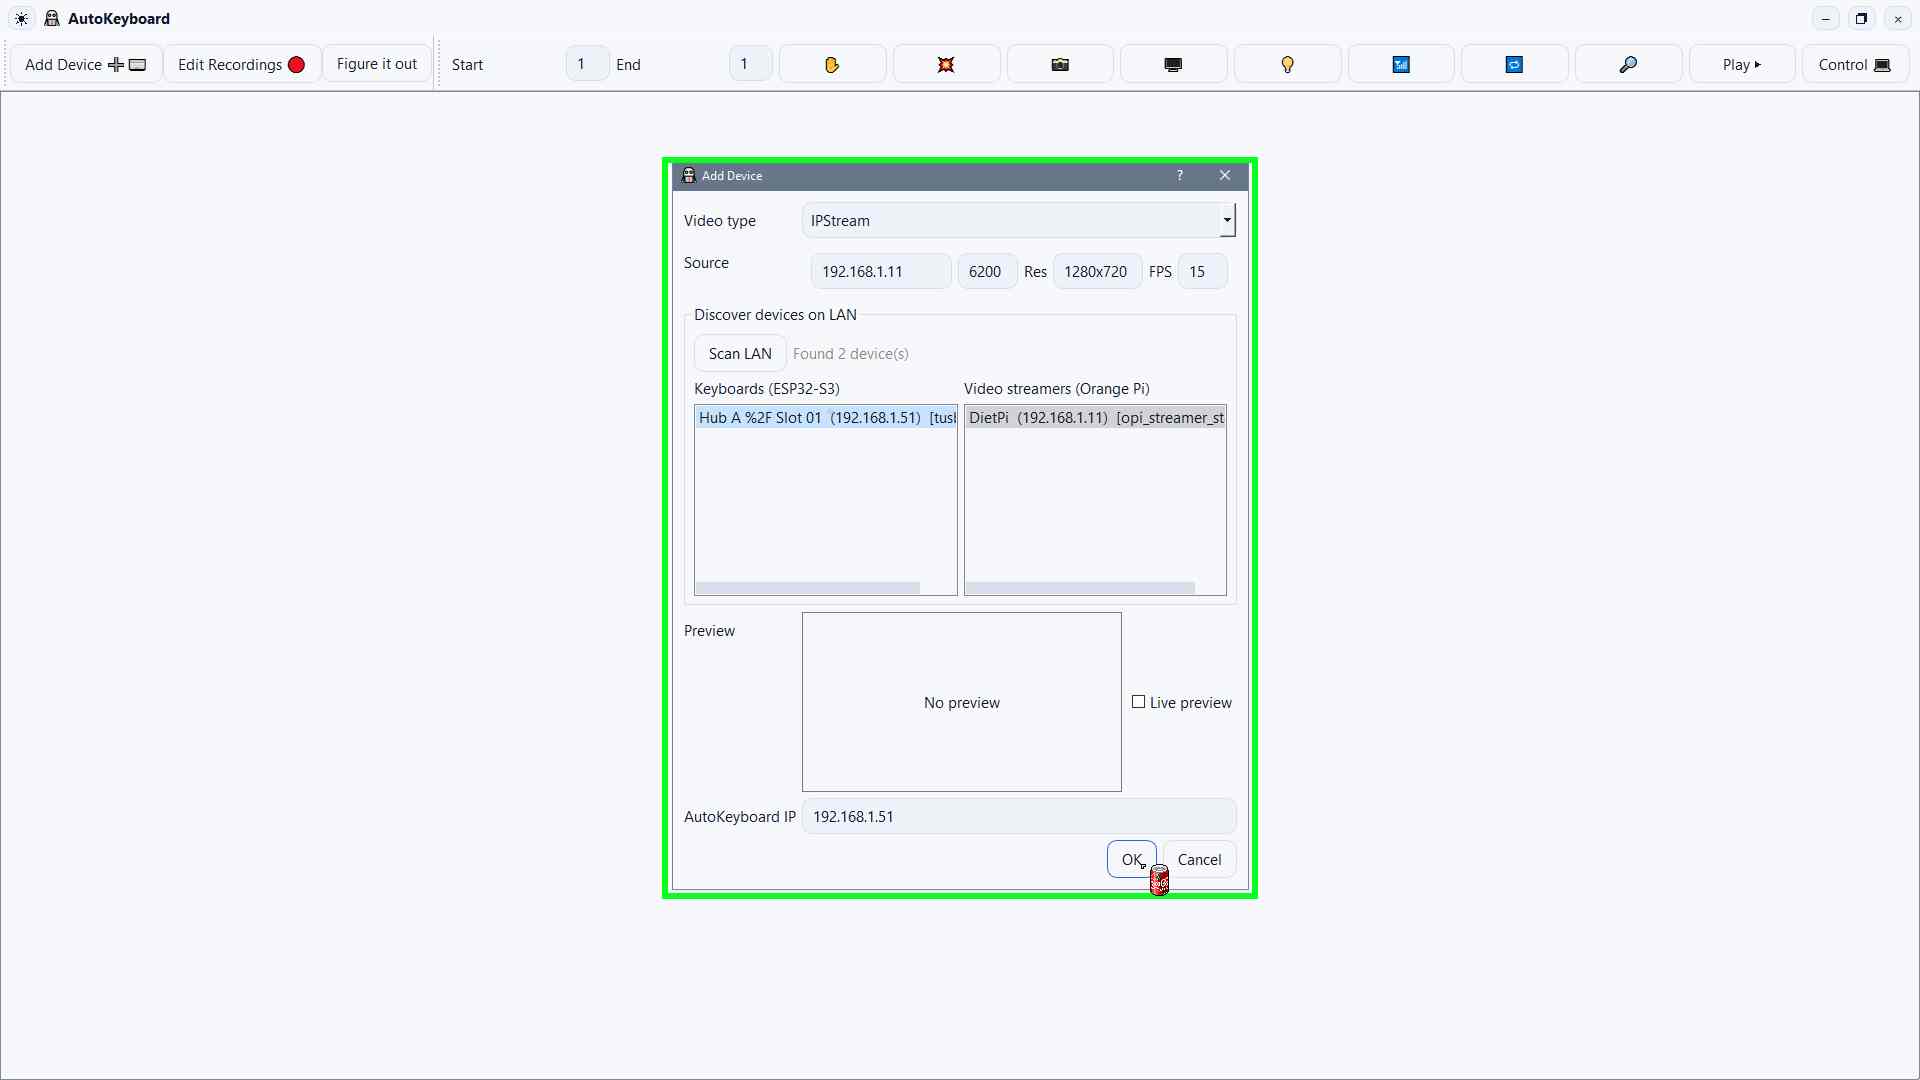
Select the Video device
Choose the correct device from the list (DietPi).
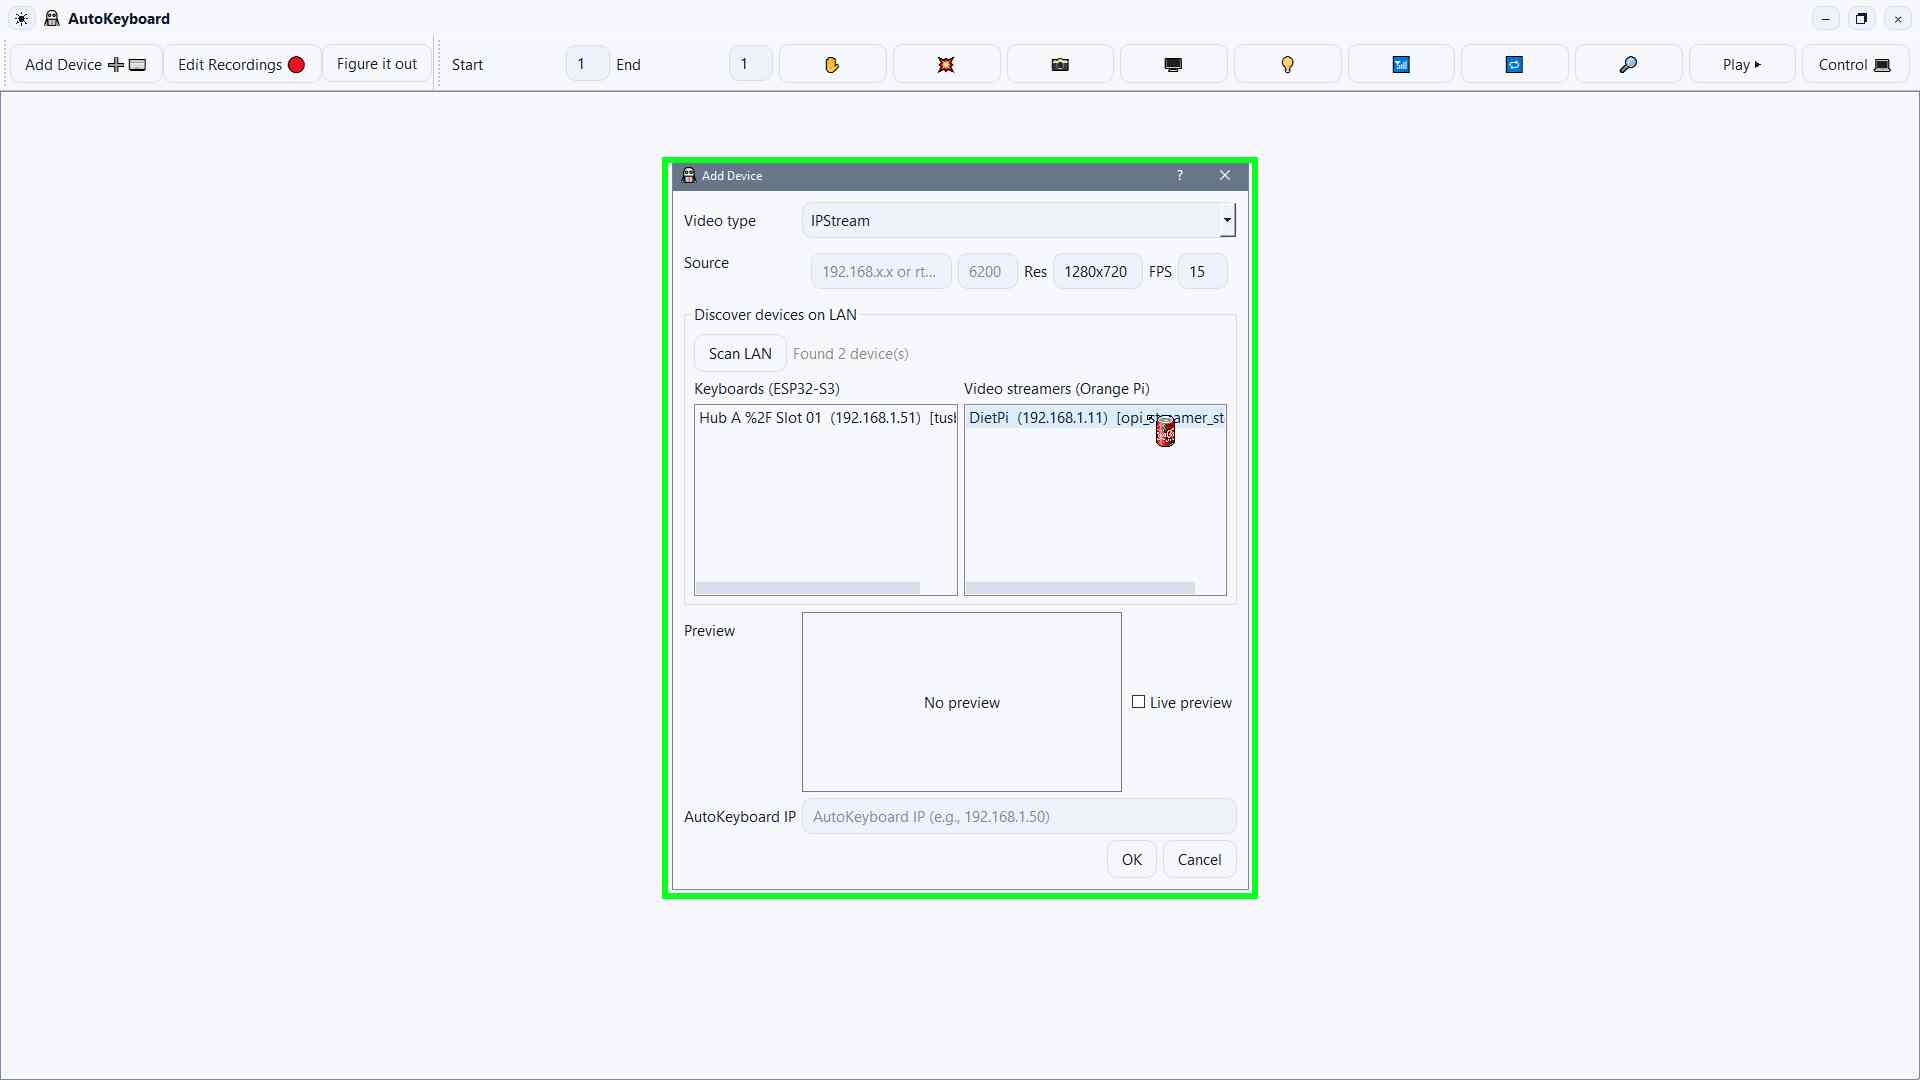
Select the Keyboard device
Choose the correct device from the list (Hub A %2F Slot 01).
Add the panel
Click OK to add the chosen devices to the panel.
Wait for it to load
The keyboard should come online instantly, see the colored dot at the bottom of the panel this should be white or blue.
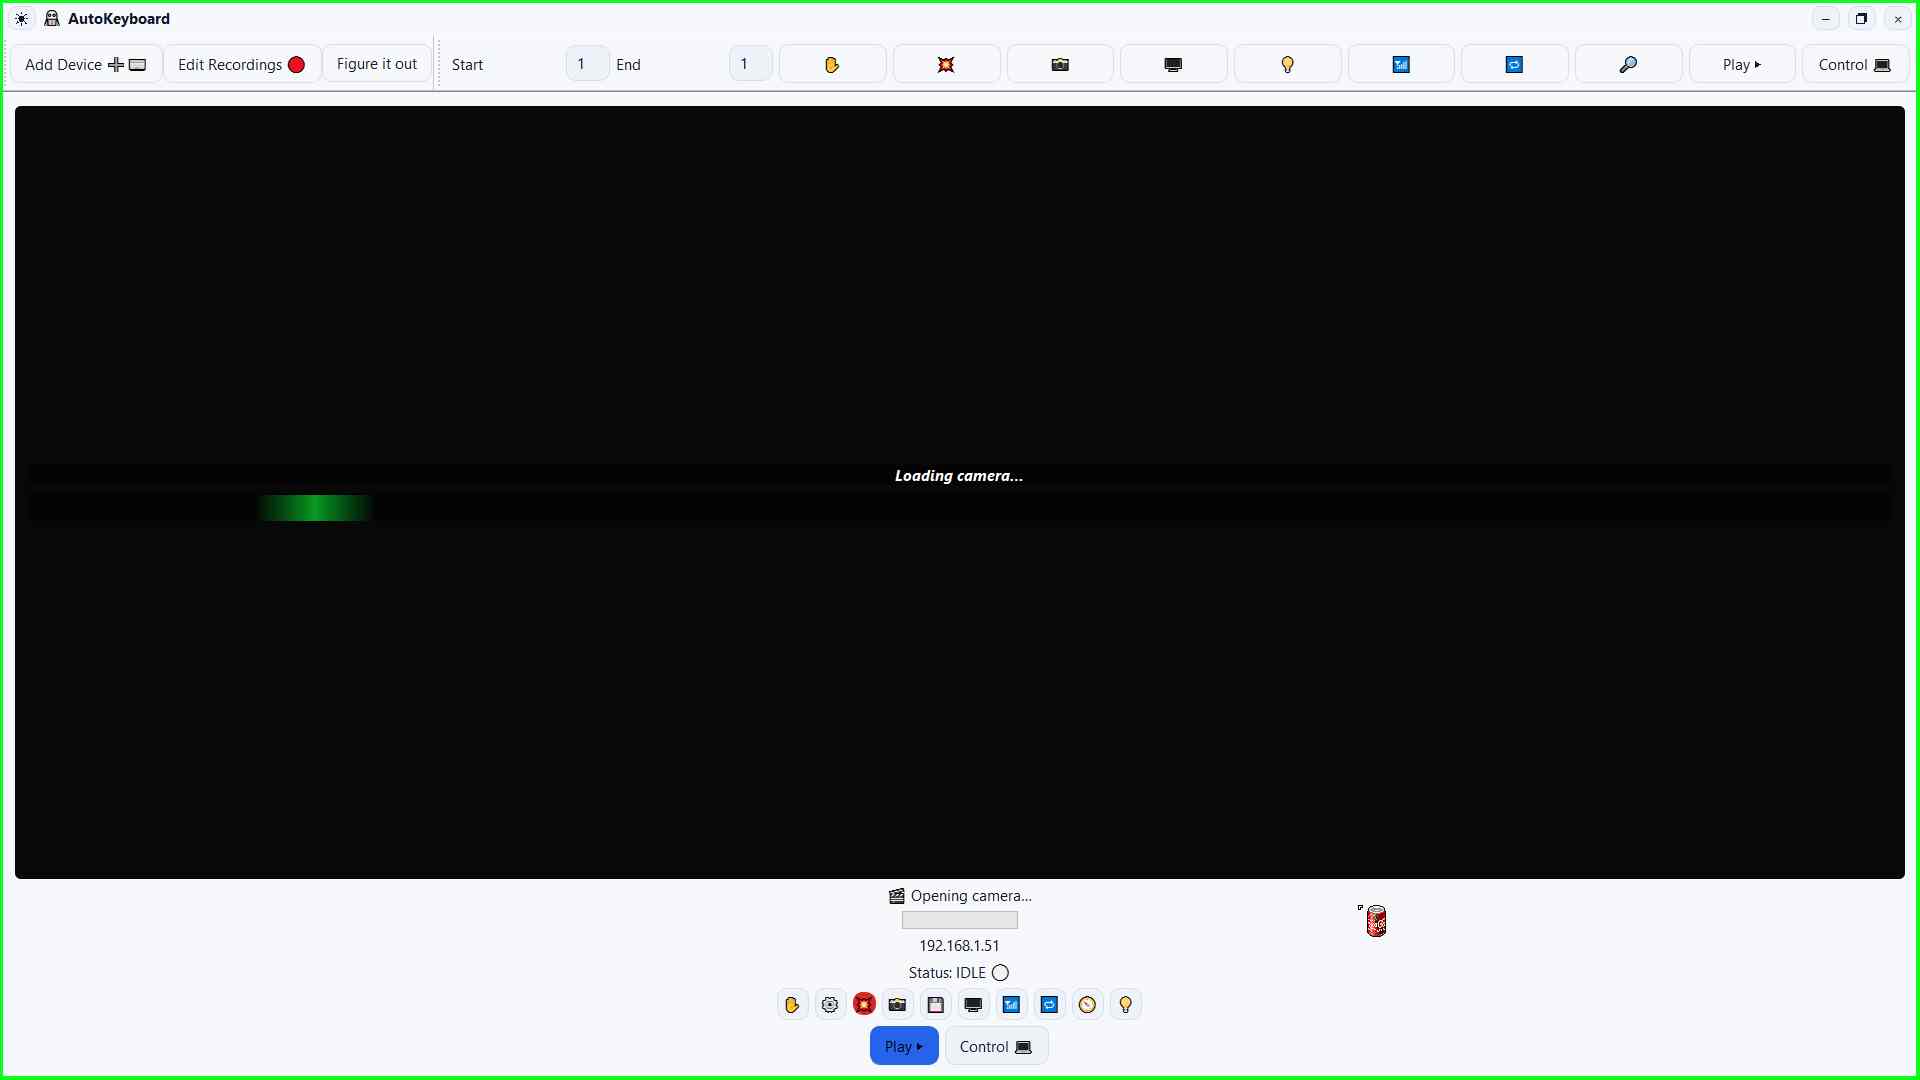
Finished
You should now see either black screen or the laptops video that you've plugged into (remember to close the lid otherwise it won't pass the video through)”.
Troubleshooting
Quick remedies for common howto/connect troubles.
It does not appear
- Try another USB port.
- Try a known-good cable.
- Unplug and replug once, then wait 5–10 seconds.
It howto/connecteth and dishowto/connecteth
- Remove hubs/dongles for initial pairing.
- Check for a loose port or howto/connector.
- Confirm the laptop’s power is stable.